Why choose Connect
Traditionally, building data pipelines requires configuring multiple components, writing SQL or code, and managing complex dependencies. Connect simplifies this process by providing a unified, wizard-driven interface that abstracts away the underlying technical details. Instead of dealing with connector setup or orchestration logic, you can focus purely on defining your data flow. By consolidating pipeline creation and management into a single, guided experience, Connect reduces operational overhead and shortens the time from idea to production. It enables teams to move faster, minimize errors, and deliver real-time insights without the need for deep infrastructure expertise.When to use Connect
Connect is ideal for straightforward data integration scenarios that do not require complex, multi-stage transformations. Whether you’re a beginner building your first pipeline or an expert who wants to move faster, it lowers the barrier to creating reliable real-time pipelines with minimal setup and maintenance.Create a pipeline with Connect
To start using Connect in RisingWave Cloud:- Navigate to Projects page and select a project.
- In the sidebar, click RW Connect.
Set up sources
Connect your data sources to stream real-time data into RisingWave for processing and analysis. Supported sources include:- PostgreSQL
- MySQL
- Kafka
- MongoDB
- SQL Server
1
Configure & Test Connection
Enter the PostgreSQL connection details and test the connection to ensure RisingWave can access your source database.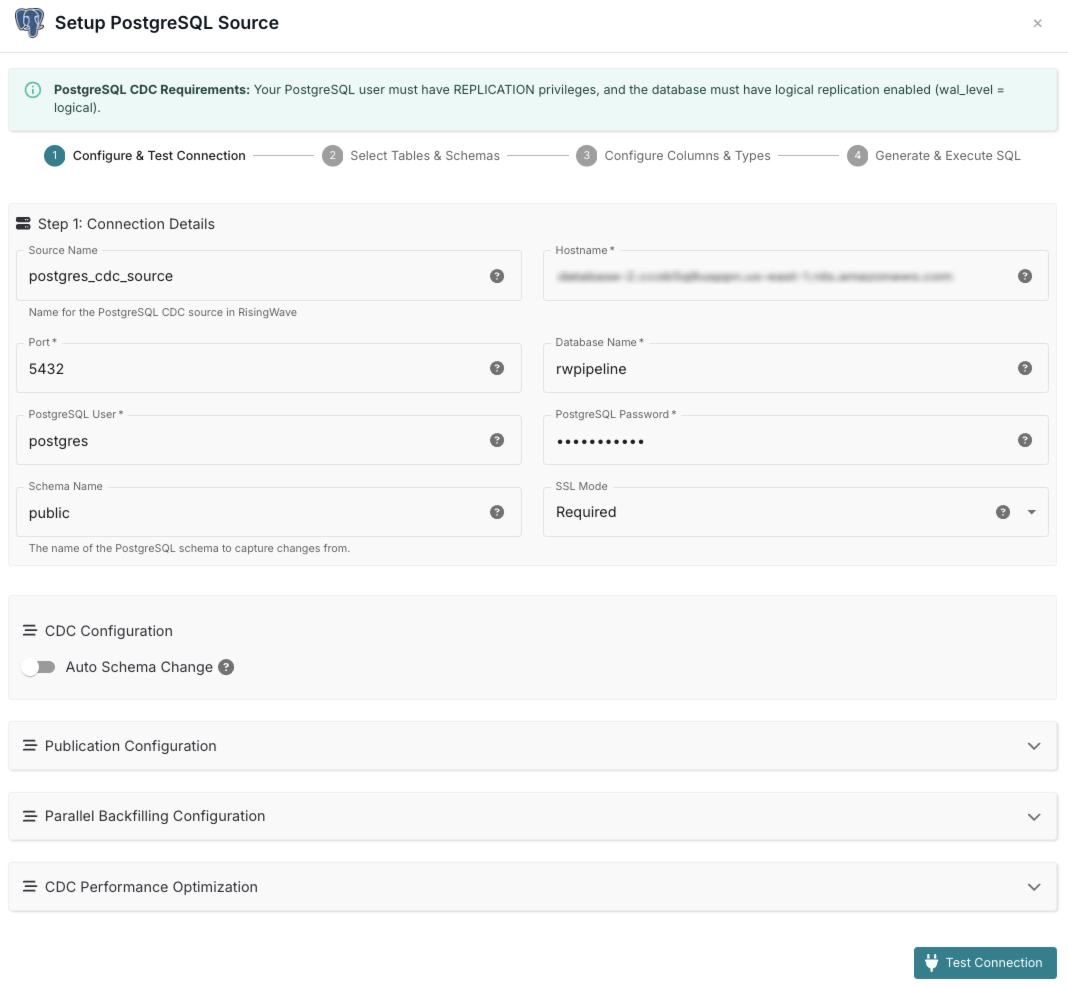
2
Select Tables & Schemas
Choose the schemas and tables from your PostgreSQL database that you want to replicate into RisingWave.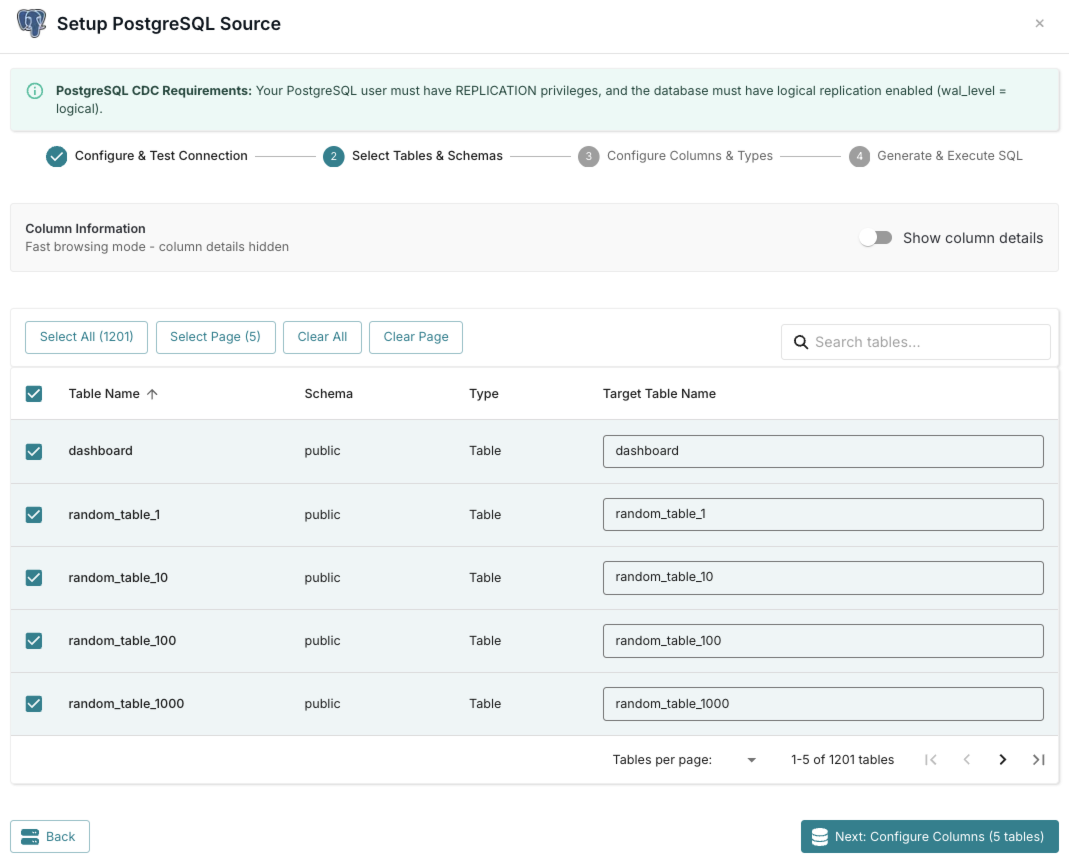
3
Configure Columns & Types
Select specific columns, review data types, and define primary keys for your selected tables.
4
Generate & Execute SQL
Review the generated SQL statements and execute them to create the source in RisingWave.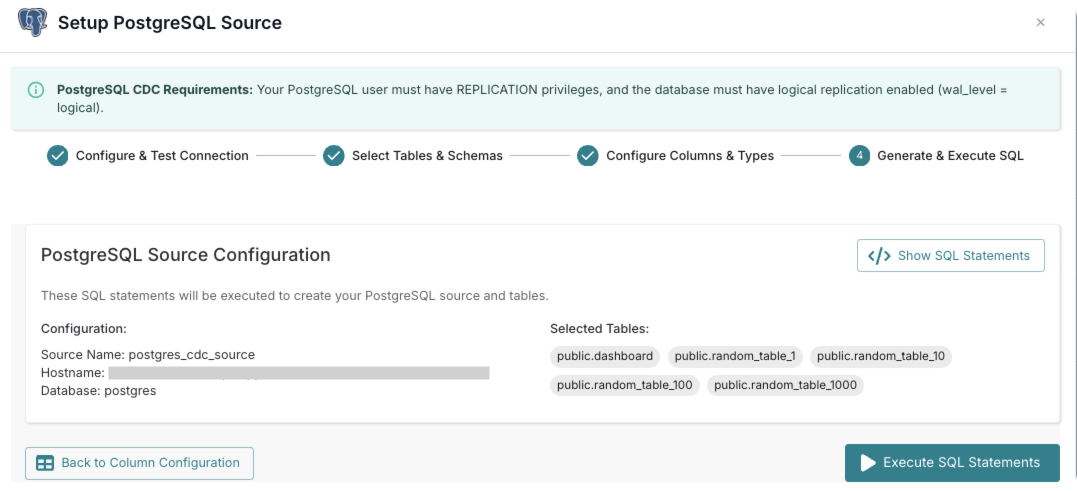
Set up sinks
Deliver your processed data to various destinations and downstream systems. Supported sinks include:- Apache Iceberg
- Snowflake
- Elasticsearch
- PostgreSQL
- Amazon Redshift
- MySQL
- Kafka
- Amazon S3
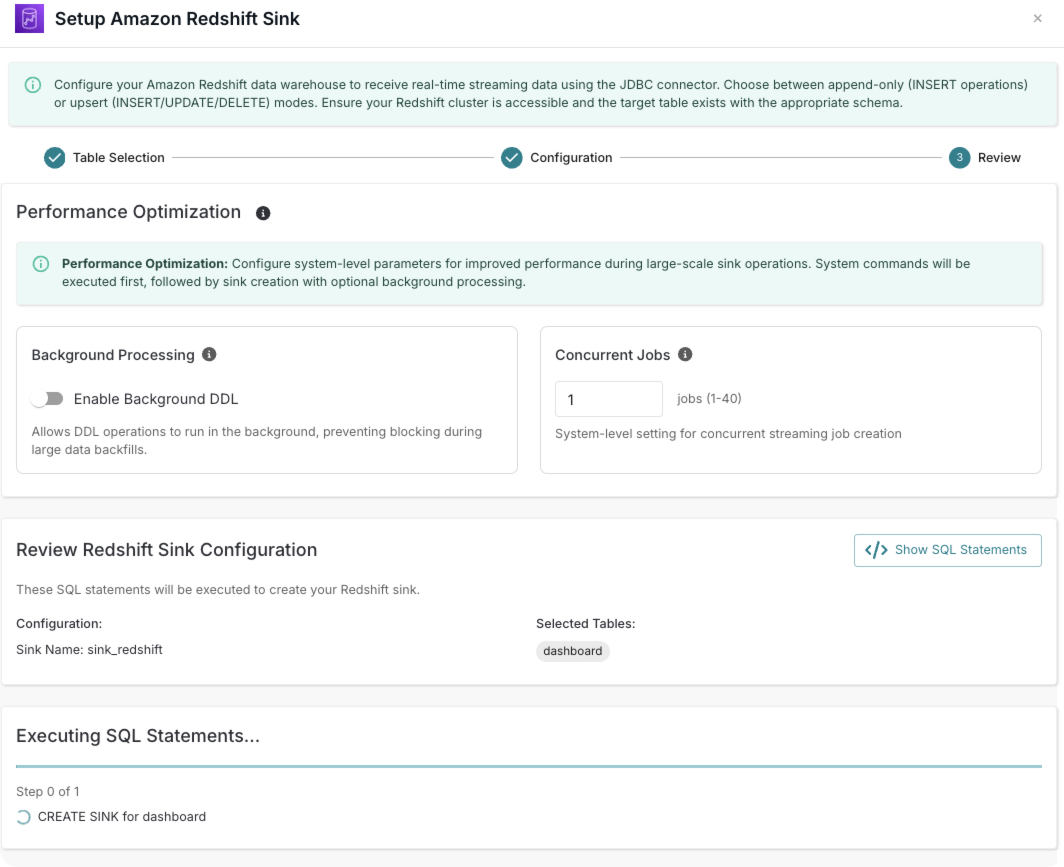
1
Table Selection
Choose the tables from your database that you want to sink to Redshift. You can select multiple tables to create multiple sinks at once.
2
Configuration
Configure the connection details and settings for your Redshift sink, including authentication, data mapping, and S3 intermediate staging.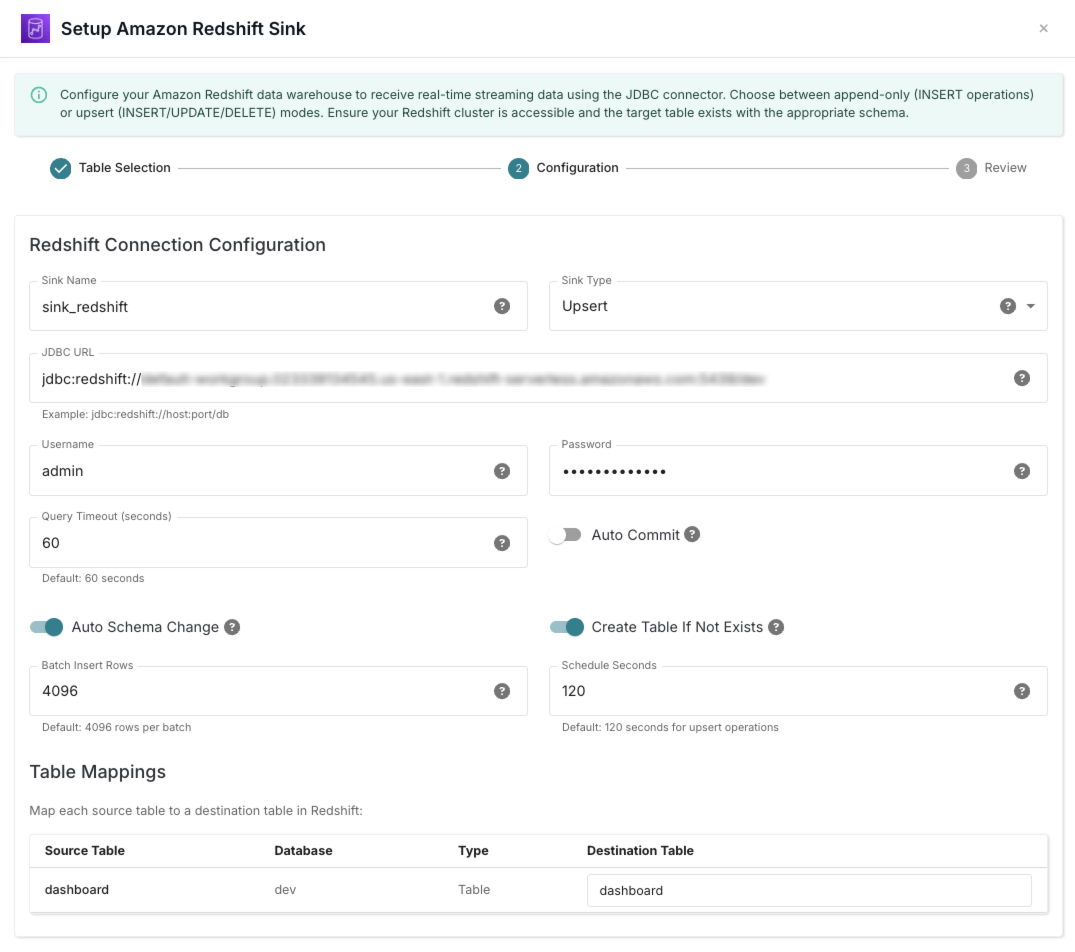
3
Review
Optimize performance settings and review your Redshift sink configuration.